What is vRealize network insight?
VMware vRealize Network Insight delivers intelligent operations for software-defined networking and security. With the help of this product you can optimize network performance and availability with visibility and analytics across virtual and physical networks.It accelerates micro-segmentation planning and deployment, enables visibility across virtual and physical networks, and provides operational views to manage and scale VMware NSX deployments.

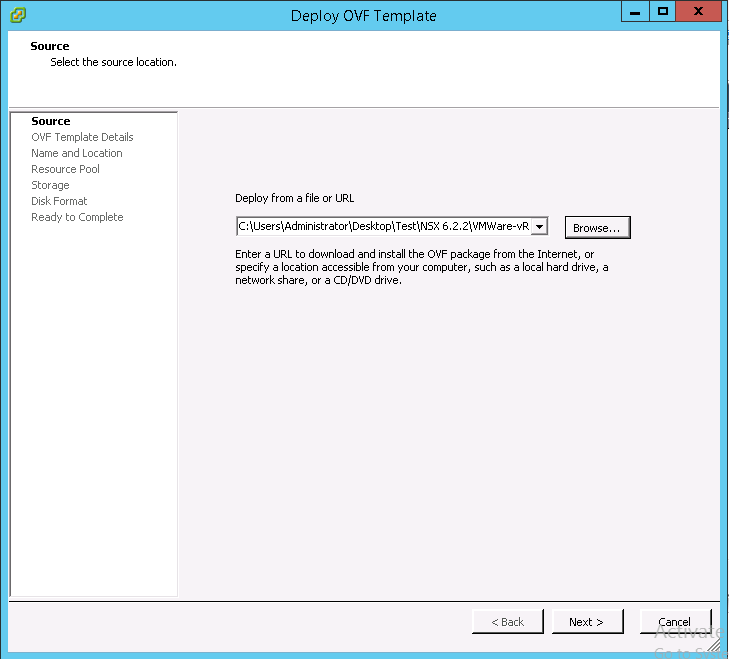
vRealize Network Insight having two OVA files.
VMware_vRealize_Network_Insight_3.4_platform.ova
VMware_vRealize_Network_Insight_3.4_proxy.ova
System requirement for the OVA deployment are:
- vRealize Network Insight Platform OVA:
– 8 cores – Reservation 4096 Mhz
– 32 GB RAM – Reservation – 16GB
– 750 GB – HDD, Thin provisioned
- vRealize Network Insight Proxy OVA
- 4 cores – Reservation 2048 Mhz
- 10 GB RAM – Reservation – 5GB
- 150 GB – HDD, Thin provisioned
- VMware vCenter Server (version 5.5 and 6.0).
- vCenter Server Credentials with privileges:
- Distributed Switch: Modify
- dvPort group: Modify
- VMware ESXi:
- 5.5 Update 2 (Build 2068190) and above
- 6.0 Update 1b (Build 3380124) and above
- VMware Tools is installed on all the virtual machines in the data center. This helps in identifying the VM to VM traffic.
The deployment is relatively straight forward, similar to deploying any other OVA.

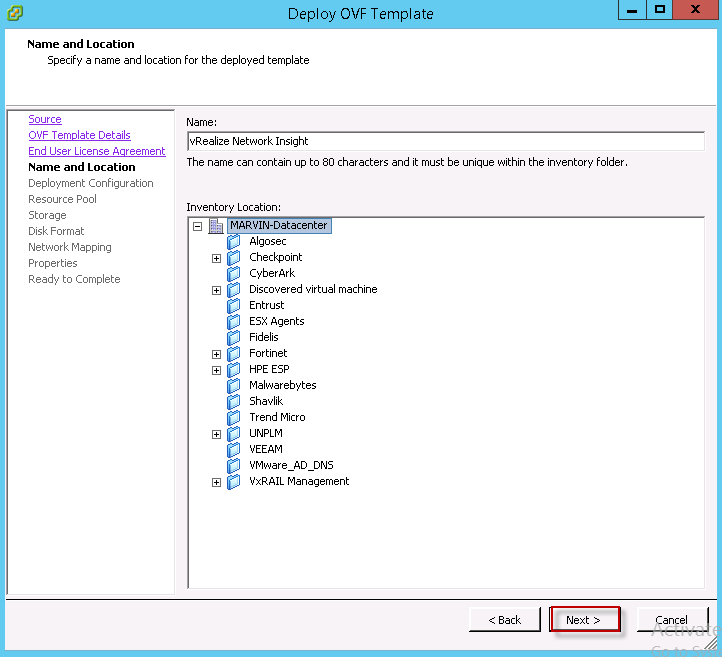
Choose the Data center
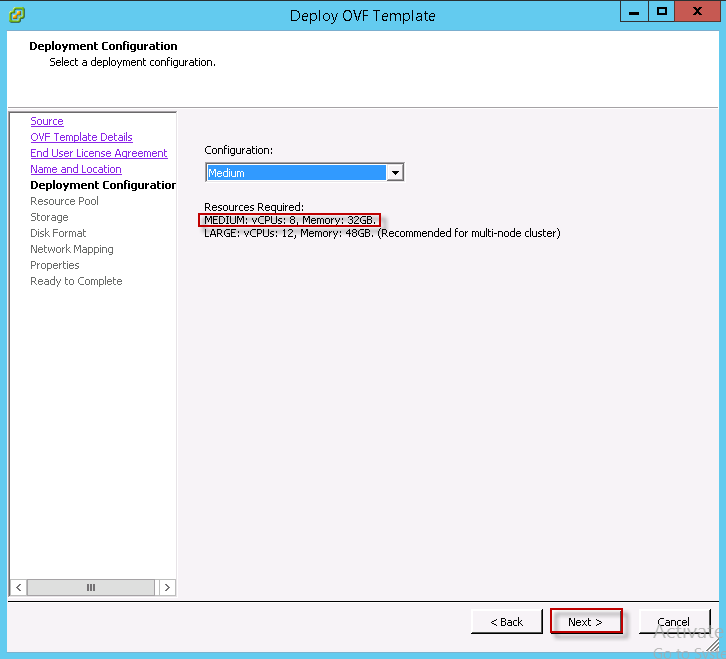
Choose the configuration according to your environment requirement
Now select the resource pool

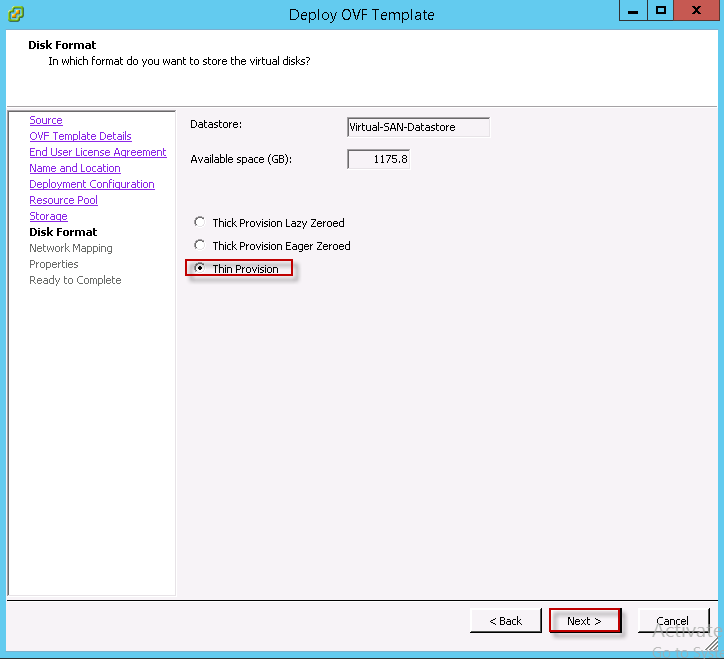
Now you have to select the datastore which you want to use in virtual appliance.

It is strongly recommend to use for thick provision in production environment but am using thin provisioning for a change.
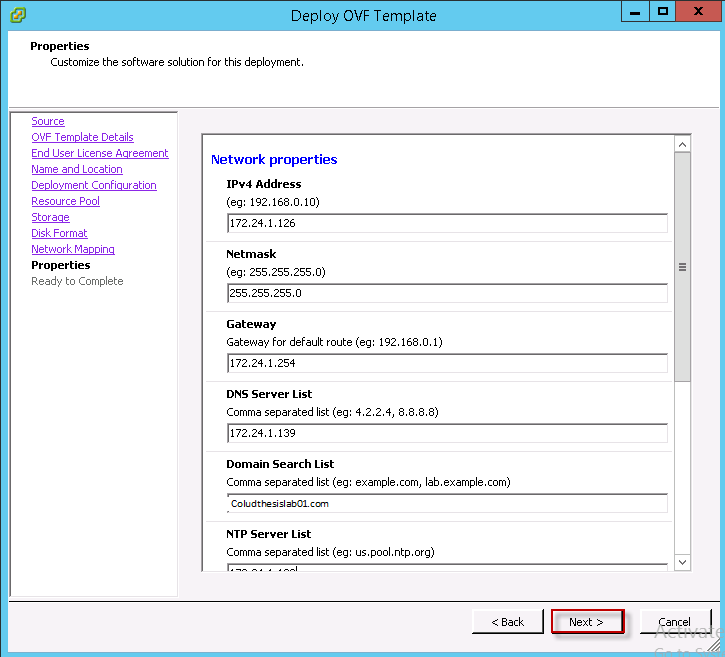
Network Mapping

Share the basic networking details
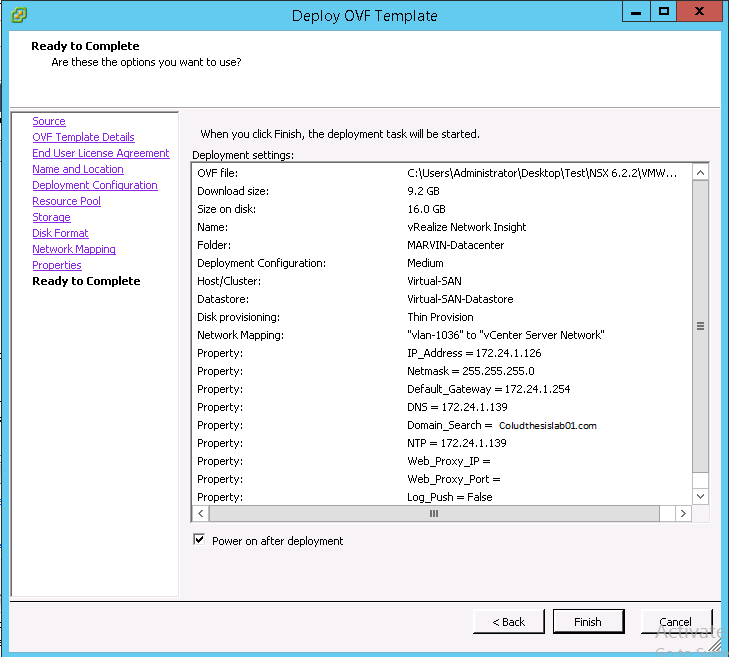
Now click on finish and wait for the virtual appliance deployment completion.
To check the progress of appliance deployment open the virtual appliance console .

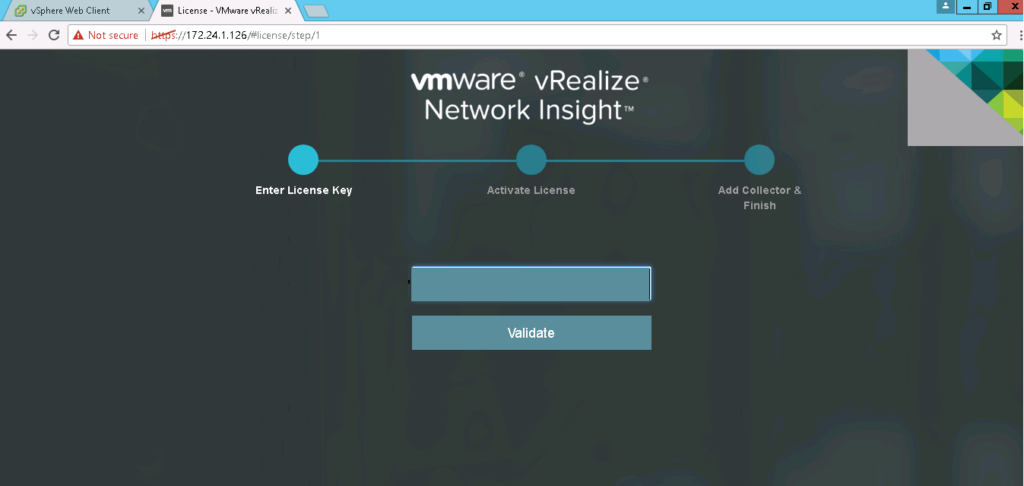
Go to the configuration screen by going to https://<IP or FQDN of the appliance> . The first thing is to enter the vRNI license and click on validate.
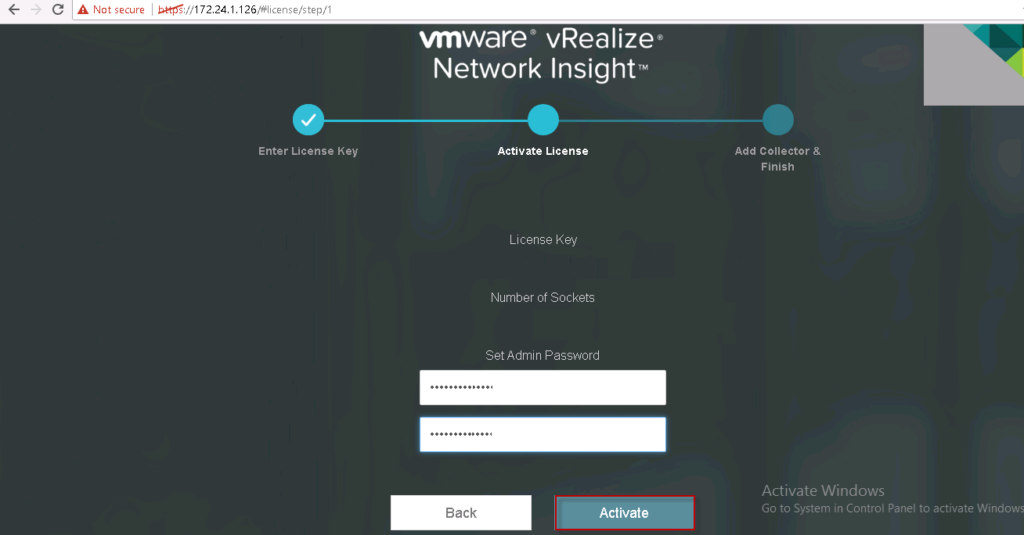
After license is validated, setup the admin password for the appliance login. Click on activate
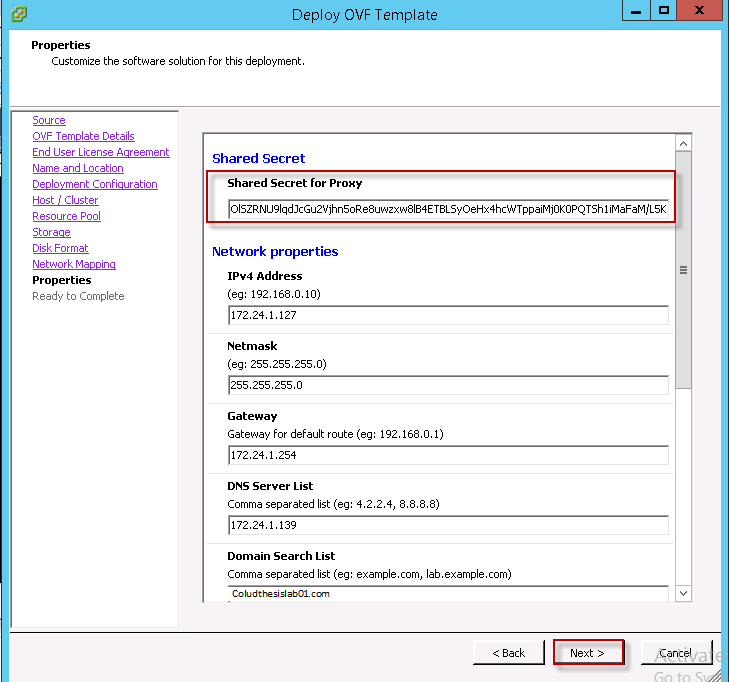
Now need to generate the secret for the proxy VM. Click on Generate button.

Now copy shared secret.
Let’s go ahead and deploy the Proxy VM .I will not cover the Proxy VM deployment again, it’s relatively straight forward and similar to the platform appliance deployment.
During Proxy Appliance deployment under property, you need to paste the shared secret generated during the platform virtual appliance
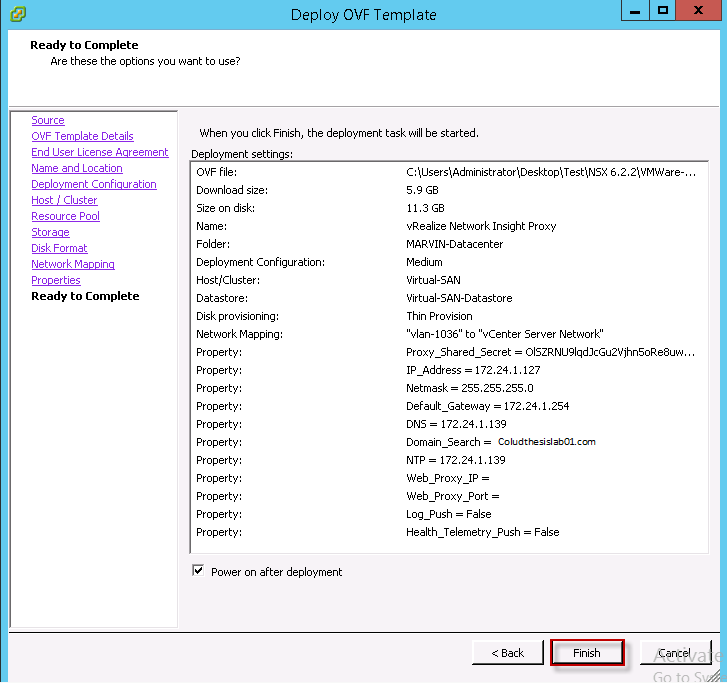
After deployment is done it is automatically sensed in the main configuration page.

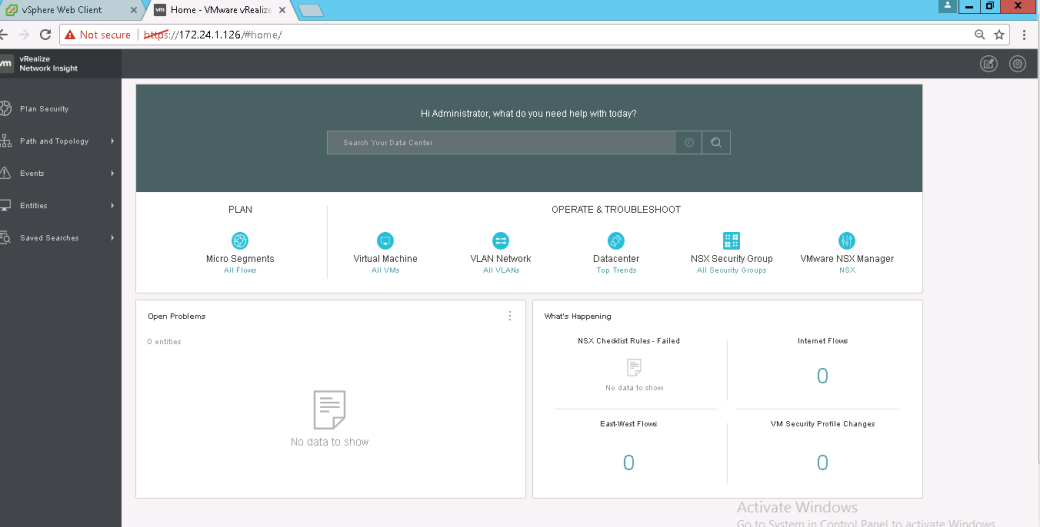
Now you can click on finish and login to the vRNI GUI by using “admin@local” user and password that you have setup initially.

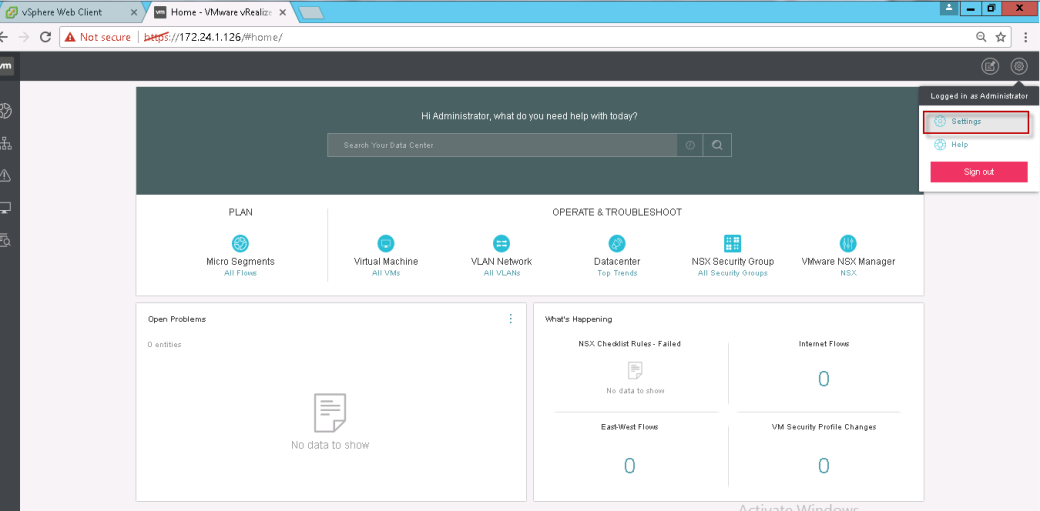
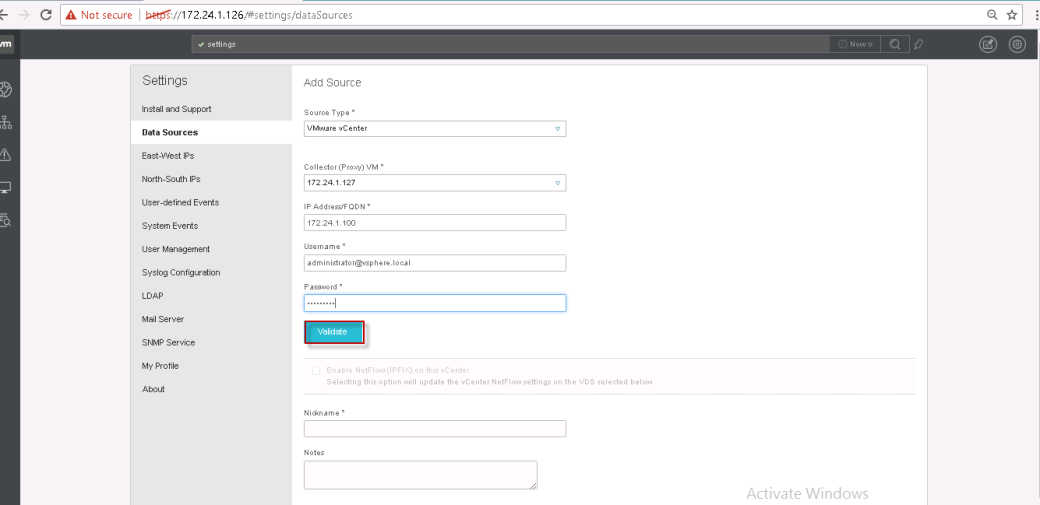
On the top right corner, click on Profile -> settings ->Data Sources ->Add new data sources.

Now you may enter the vCenter server with admin credentials and validate to check if vRNI is able to connect to vCenter Server successfully


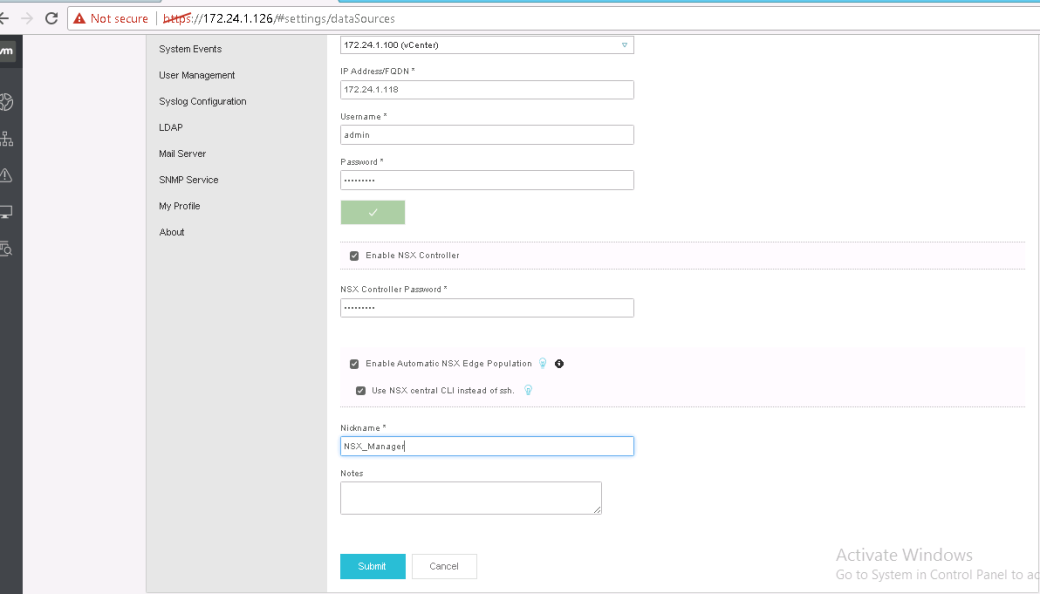
Same as add the NSX manager as a data source to vRNI .


Thanks hope you like it.
Rajiv Pandey.