We will be editing the following files, each has a specific role:
- sip.conf (domain name, Vo-IP registrar, users who can connect directly)
- extensions.conf (extension dialing and Vo-IP inbound/outbound)
- voicemail.conf (voice mail information)
These files are located in:
- /etc/asterisk
Have the following Vo-IP registrar information from your provider on hand, including:
- SIP Main Username (ex: 2244)
- SIP Main Password (ex: pw99)
- DID Number (ex: 2892229999)
- DID Point of Presence (ex: toronto.voip.ms)
Making a backup of sip.conf
Type the following to move the original sip.conf
sudo mv /etc/asterisk/sip.conf /etc/asterisk/sip.conf.orig ↵
Creating a new sip.conf and configuring it
You need to change the following for this to work properly for you:
- Register information provided from your Vo-IP registrar.
- externhost to your domain name.
- [voipms] information to connect to your provider, that allows you to connect to the PSTN.
Type the following to create a new sip.conf
sudo vi /etc/asterisk/sip.conf ↵
[general]
context=internal
register => 2244:pw99@toronto.voip.ms:5060
allowguest=no
allowoverlap=no
bindport=5060
bindaddr=0.0.0.0
srvlookup=no
disallow=all
allow=ulaw
alwaysauthreject=yes
canreinvite=no
nat=yes
session-timers=refuse
externhost=draalin.com
externrefresh=15
localnet=192.168.1.0/255.255.255.0

[voipms]
canreinvite=no
context=internal
host=toronto.voip.ms
secret=pw99
type=friend
username=2244
disallow=all
allow=ulaw
fromuser=2244
trustrpid=yes
sendrpid=yes
insecure=invite
nat=yes

[7001]
type=friend
host=dynamic
secret=123
context=internal

[7002]
type=friend
host=dynamic
secret=456
context=internal
Image below for reference.
.

You can save this file by first pressing ESC then letting go.
Followed by holding Shift and : then letting go again.
Now type wq! followed by pressing enter.
Your file is now saved.
Making a backup of extensions.conf
Type the following to move the original extensions.conf
sudo mv /etc/asterisk/extensions.conf /etc/asterisk/extensions.conf.orig ↵
Creating a new extensions.conf and configuring it
You need to change the following for this to work properly for you:
- Anything with PlayBack or Background that contains “custom-*” are custom GSM files that I have created for my IVR (Interactive Voice Response) menu which are placed in the/etc/asterisk/sounds/en directory. You will need to create your own or remove them download the custom gsm files here.
- The include lines are required for my Vo-IP register, voip.ms.
- The [voipms-outbound] include is supplied from voip.ms which allows outbound calls.
- The [voipms-inbound] include contains the DID provided from my registrar voip.ms which manages inbound calls.
Type the following to create a new extensions.conf
sudo vi /etc/asterisk/extensions.conf ↵
[internal]
exten => s,1,Answer()
exten => s,n,PlayBack(custom-draalincom)
exten => s,n,PlayBack(custom-menuoptions)

exten => s,n,Background(vm-press)
exten => s,n,Background(digits/1)
exten => s,n,Background(vm-for)
exten => s,n,Background(custom-work)

exten => s,n,Background(vm-press)
exten => s,n,Background(digits/2)
exten => s,n,Background(vm-for)
exten => s,n,Background(custom-cell)

exten => s,n,Background(vm-press)
exten => s,n,Background(digits/3)
exten => s,n,Background(vm-for)
exten => s,n,Background(custom-home)

exten => s,n,WaitExten()

exten => 1,1,Dial(SIP/7001,60)
exten => 2,1,Dial(SIP/9053338888@voipms)
exten => 3,1,Dial(SIP/9054447777@voipms)

exten => 7001,1,Answer()
exten => 7001,2,Dial(SIP/7001,60)
exten => 7001,3,Playback(vm-nobodyavail)
exten => 7001,4,VoiceMail(7001@main)
exten => 7001,5,Hangup()

exten => 7002,1,Answer()
exten => 7002,2,Dial(SIP/7002,60)
exten => 7002,3,Playback(vm-nobodyavail)
exten => 7002,4,VoiceMail(7002@main)
exten => 7002,5,Hangup()

exten => 8001,1,VoicemailMain(7001@main)
exten => 8001,2,Hangup()

exten => 8002,1,VoicemailMain(7002@main)
exten => 8002,2,Hangup()

include => voipms-inbound
include => voipms-outbound

[voipms-outbound]
exten => _1NXXNXXXXXX,1,Dial(SIP/${EXTEN}@voipms)
exten => _1NXXNXXXXXX,n,Hangup()
exten => _NXXNXXXXXX,1,Dial(SIP/1${EXTEN}@voipms)
exten => _NXXNXXXXXX,n,Hangup()
exten => _011.,1,Dial(SIP/${EXTEN}@voipms)
exten => _011.,n,Hangup()
exten => _00.,1,Dial(SIP/${EXTEN}@voipms)
exten => _00.,n,Hangup()

[voipms-inbound]
exten => 2892229999,1,Answer()
Image below for reference.


You can save this file by first pressing ESC then letting go.
Followed by holding Shift and : then letting go again.
Now type wq! followed by pressing enter.
Your file is now saved.
Making a backup of voicemail.conf
Type the following to move the original voicemail.conf
sudo mv /etc/asterisk/voicemail.conf /etc/asterisk/voicemail.conf.orig ↵
Creating a new voicemail.conf and configuring it
Type the following to create a new voicemail.conf
You need to change the following for this to work properly for you:
- You can add a password to check by dialing the extension we configured in extensions.conf
- You can setup a name for the user of the mailbox.
- You can also add an e-mail address that will send the voicemail directory to them.
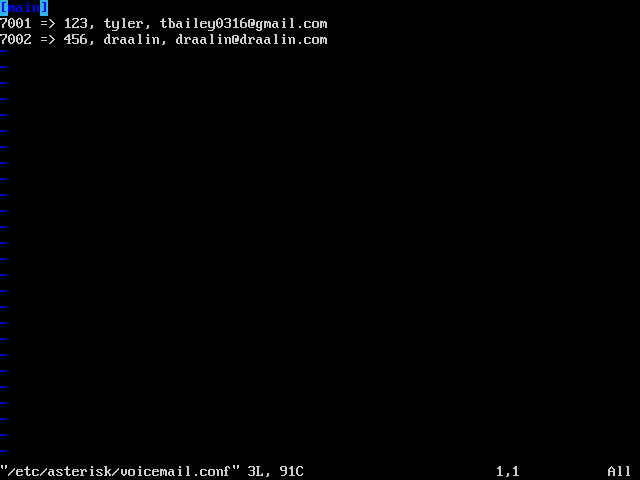
sudo vi /etc/asterisk/voicemail.conf ↵
[main]
7001 => 123, tyler, tbailey0316@gmail.com
7002 => 456, draalin, draalin@draalin.com
Image below for reference.
You can save this file by first pressing ESC then letting go.
Followed by holding Shift and : then letting go again.
Now type wq! followed by pressing enter.
Your file is now saved.
Reloading Asterisk to apply the configuration
You can restart asterisk by any of the three following ways:
Method 1
sudo asterisk -rx reload ↵
Method 3
sudo /etc/init.d/asterisk restart ↵
Method 2
To open the CLI type:
sudo asterisk -r ↵
To reload type:
reload ↵
To exit type:
exit ↵
Checking your Vo-IP’s registrar SIP registration status
To open the CLI type:
sudo asterisk -r ↵
To check the registry type:
sip show registry ↵
To exit type:
exit ↵
Under State if it says Registered you are connected to your Vo-IP registrar.
Image below for reference.

Thanks hope you like it.
Rajiv Pandey.