Deploy VRA 8.2 on VCenter 7
Appliances are inside the source –
- VRealize Life Cycle Manager.
- VRealize Identity Manager.
- VRealize Automation.
VRealize Life Cycle Manager.
This appliance is responsible for deploying the other appliances and responsible for the patches deployments and adding any additional components like (VROPS, LOG Insight, Network Insight).
VRealize Identity Manager.
This Appliance responsible for the user identity and to unify the login for all the VMware systems.
VRealize Automation.
This Appliance is the main solution which provide the self-service portal with the automation and management as mentioned in previous post and it includes the orchestrator embedded and we can split it and install it separately.
Install The appliances using the installer
Firsr start the installer.exe in the iso file under >vrlcm-ui-installer>win32.

Then select Install

After that Click Next

Then check the EULA and hit Next.

After that ,configure the VCenter name and the credentials for the connection. And click Next.
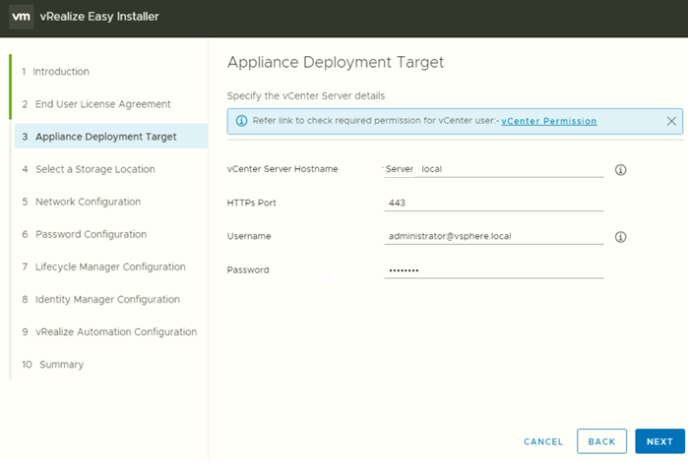
Accept the certificate warning

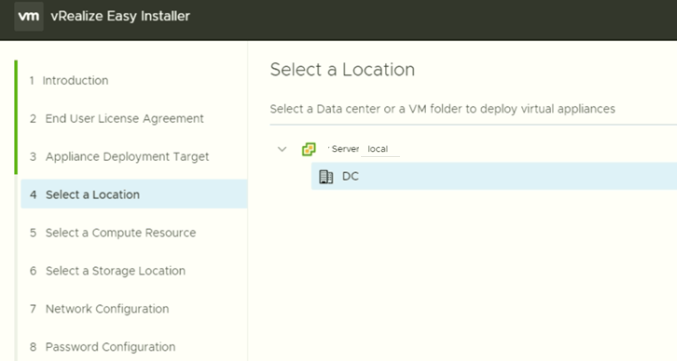
Select the Datacenter in the vcenter and click Next.
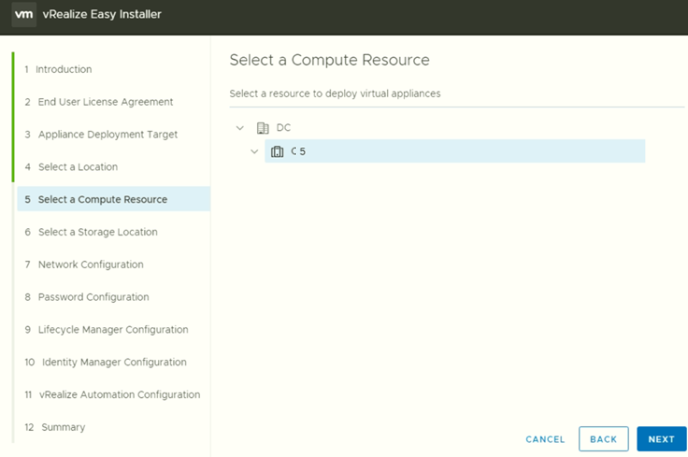
Select the cluster and usually to use the management cluster.
Select the storage and the provisioning mode “thin or thick disk then Click Next.

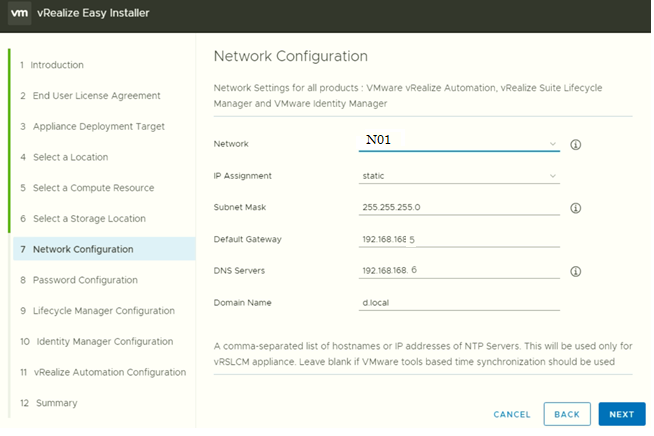
Select the Network configuration for all the appliances and click Next.
Configure the password for the root in the appliances and click Next.

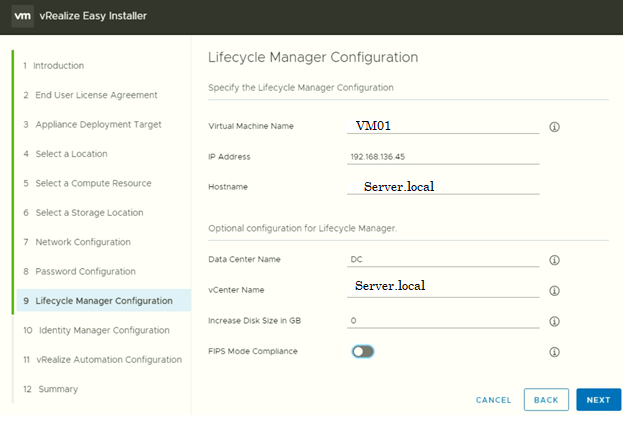
Configure the Name and the IP for the Lifecycle manager appliance and click Next.
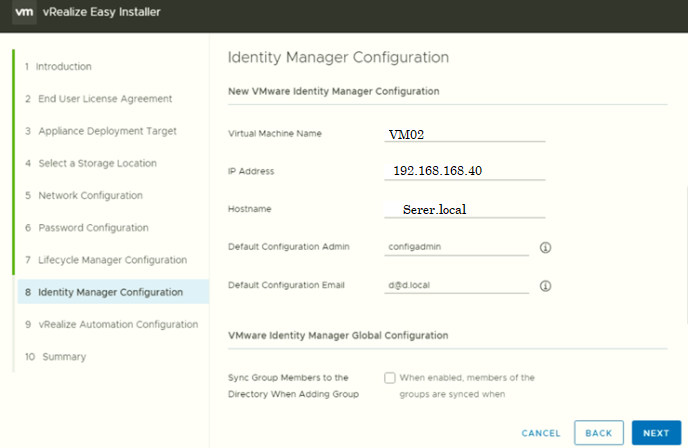
Select Install New VMware Identity Manager.
Note by default the configuration of the VM is 8 VCPU and 16 RAM, In my lab I change it to 4VCPU and 12 GB RAM.

Scroll down for the remaining configuration and click Next.
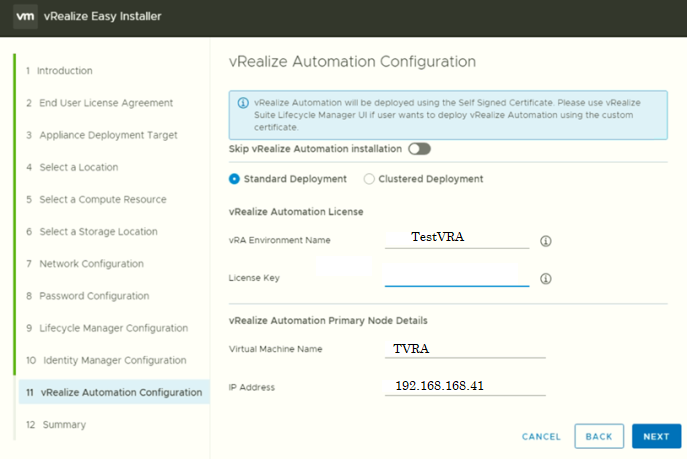
Configure the VRA appliance and the environment. And the IP of the Appliance and the K8s cluster of the VRA Appliance if needed. And click Next.
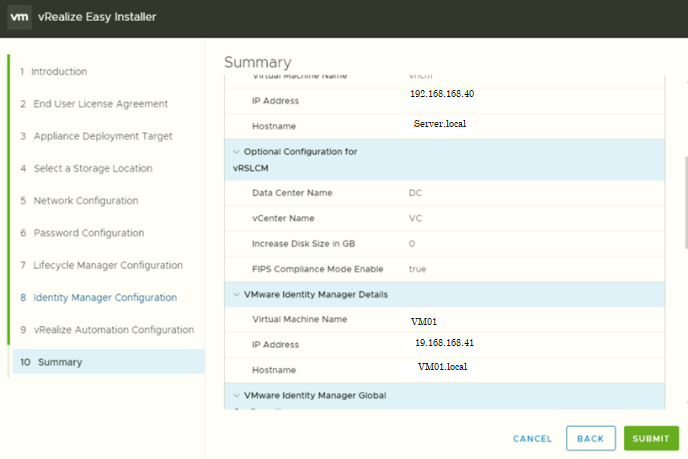
Review the configuration and click Submit.