What is VMotion?
VMware VMotion enables the live migration of running virtual machines from one physical server to another with zero downtime and to continuous service availability.
Before stating need to understand the pre-requisites to configure the vMotion .
A) Shared storage must be connected to all the VMWare ESXi hosts.
B) All the Virtual Machines are hosted on Shared Storage.
C) Virtual Machine should not be using direct resources of Host e.g. CD ROM, NIC Card, etc.
D) Enable vMotion on all the Hosts.
First we need to enable the vMotion :
Select the ESXi host on which you want to enable vMotion then go to the right pane and select configuration tab ,Select Networking .Click on the properties of vSwitch0 (Eg. ) .
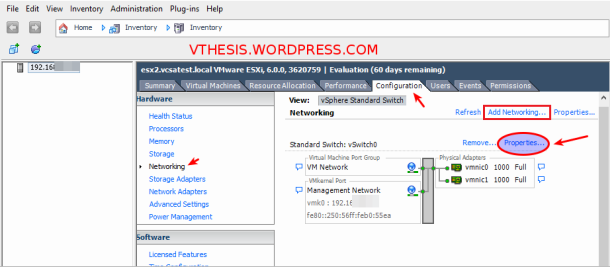
Under vSwitch0 (Eg. ) properties, you will see the vMotion is disabled By default
to enable need to select the Management Network Port-group then Click on Edit..

Under Management Network propertiesgo to the general tab then click on Ok
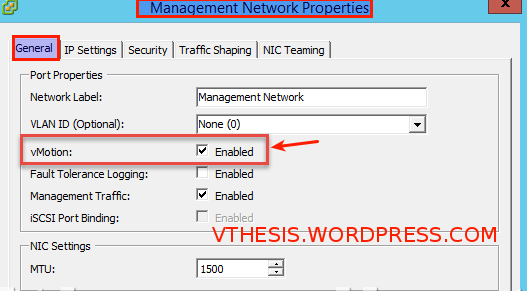
Note : The vMotion would not work if it’s enabled only on one ESXi server and not others. So we must need to enable it on all the Hypervisors on which we want to hot migrate our Virtual Machines.
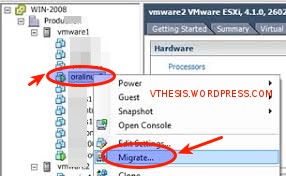
Next steps is migrate Vm’s one Esxi host to another host :
First select the Virtual Machine then go to the Summary tab.
In this practical, we can see that this Virtual Machine is hosted on ESX01 server and using Shared Storage i.e. VOL1. We’ll migrate this Virtual Machine to another hypervisor i.e. ESX02.
It is must to host Virtual Machine on shared storage before we start the migration step.

Now have to Right click the VM which you want to migrate from one ESXi host to another ESXi host and click on Migrate.
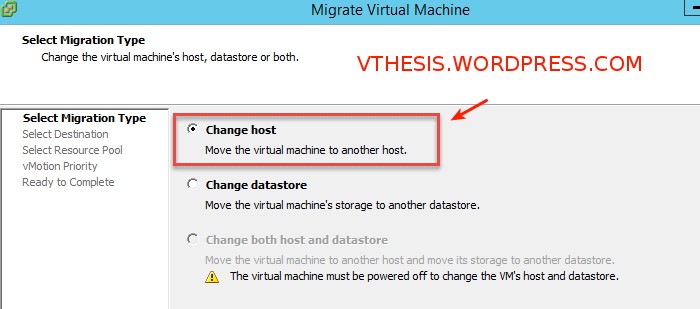
Now we will see the two options i.e. Change Host and Change Datastore . Select the option of “Change Host” and click on next.
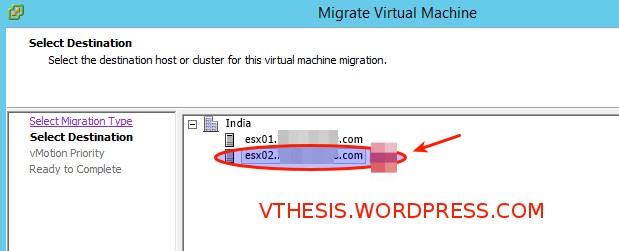
Then need to Select the destination server to which you want to migrate this VM.
For this practical, we’ll migrate this VM to ESX02.
You will see the message “Validate Succeeded” under compatibility confirms that mean VM can be migrated to ESX02.
now click on next to continue.
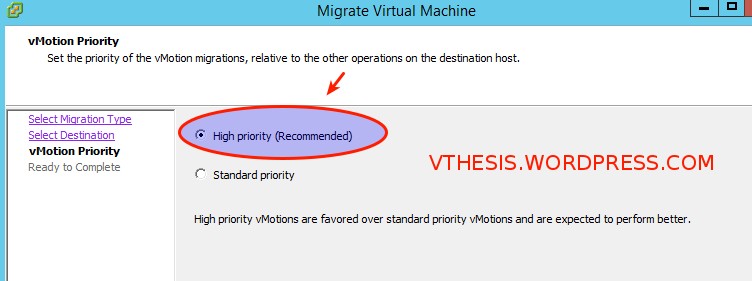
Now you will see two priority options i.e. High priority and Standard priority. Select the priority as per your requirements.
By default it’s high priority.
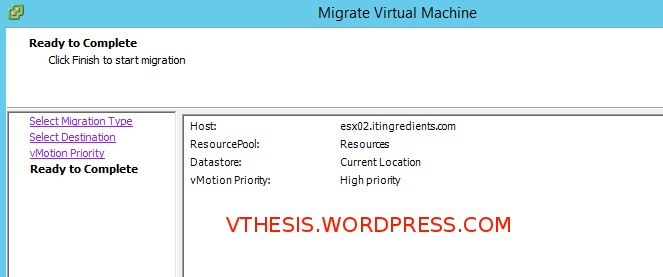
Just Verify and click on Finish to migrate .
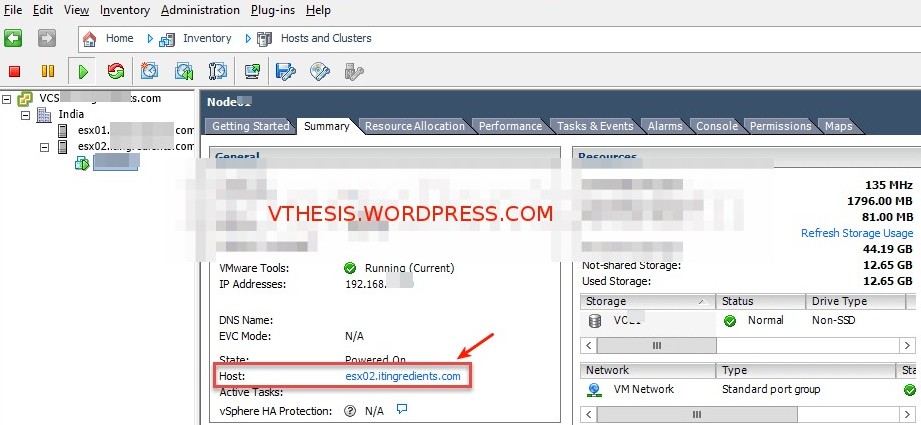
Now you will see the VM is successfully migrated to ESX02.
Thanks hope you like it.
Rajiv Pandey.