Lab Scenario
As part of your organization’s security enhancement initiative, you have been tasked with implementing Multi-Factor Authentication (MFA) in Microsoft Entra ID. MFA provides an additional layer of security by requiring users to verify their identity using multiple authentication methods before gaining access to organizational resources.
Estimated Duration: 15 Minutes
Prerequisite: A Microsoft Entra ID Premium P1 or P2 license is required to complete this exercise.
Exercise 1: Review and Enable Multi-Factor Authentication (MFA)
Task 1: Review Microsoft Entra MFA Configuration Settings
Step 1: Sign in to the Microsoft Entra Admin Center
- Open a web browser and navigate to the Microsoft Entra Admin Center:
- https://entra.microsoft.com
- Sign in using an account with Global Administrator privileges.
Step 2: Access the MFA Configuration Page
- In the Microsoft Entra Admin Center, use the Search bar at the top of the portal.
- Search for Multifactor Authentication.
- From the search results, select Multifactor Authentication. Alternative Navigation Path:
- Go to Identity
- Select Protection
- Click Multifactor Authentication
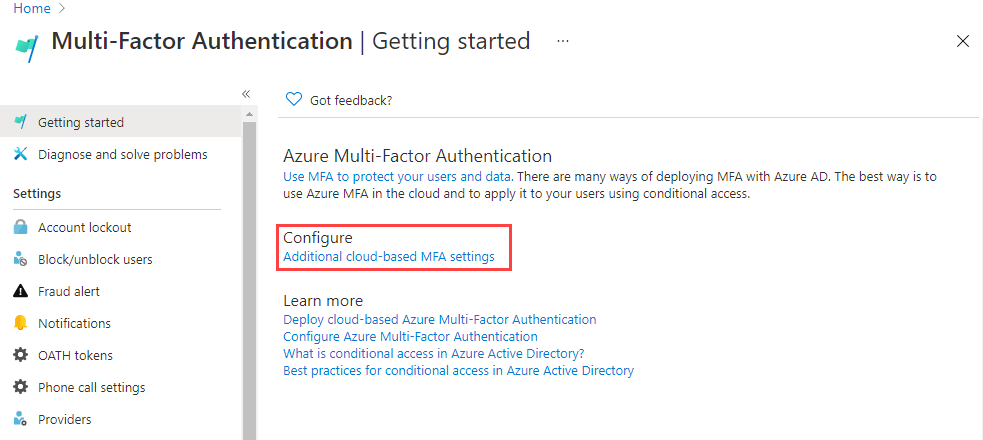
Step 3: Review Additional MFA Settings
- On the Getting Started page, locate the Configure section.
- Select Additional Cloud-Based MFA Settings.
- Review the available MFA configuration options, including:
- Authentication methods
- Account lockout settings
- Trusted IPs
- Fraud alerts
- Notification settings
- User and service settings
Note: These settings allow administrators to customize the MFA experience and strengthen identity security across the organization while balancing user convenience and compliance requirements.
Step 4: A new browser window opens, displaying the Azure Multi-Factor Authentication (MFA) Settings page. From here, administrators can review and configure various MFA options, including user settings, service settings, notification preferences, fraud alerts, trusted IPs, and other authentication-related configurations to enhance organizational security.
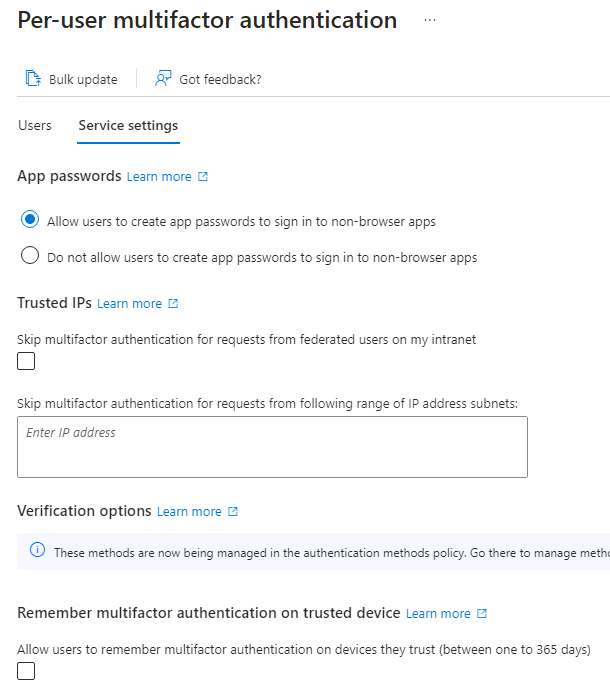
Supported Authentication Methods
This section allows administrators to define the authentication methods that users can utilize for Multi-Factor Authentication (MFA). In the example shown above, all available authentication methods are enabled, providing users with multiple verification options during the sign-in process.
App Passwords
Administrators can also manage App Passwords from this page. App Passwords are designed for legacy applications and devices that do not support modern authentication or MFA prompts.
When enabled, users can generate a unique application-specific password that allows the application to authenticate using their Microsoft Entra ID account without requiring MFA during each sign-in. This helps maintain compatibility with older applications while supporting the organization’s MFA requirements.
Note: Microsoft recommends using modern authentication methods whenever possible, as App Passwords provide reduced security compared to MFA-capable applications.
Task 2: Configure a Conditional Access Policy to Enforce MFA for Rajiv Pandey
In this task, you will create a Conditional Access policy that requires Multi-Factor Authentication (MFA) for a specific user. Conditional Access enables organizations to apply security controls based on user identity, application access, device state, and other sign-in conditions.
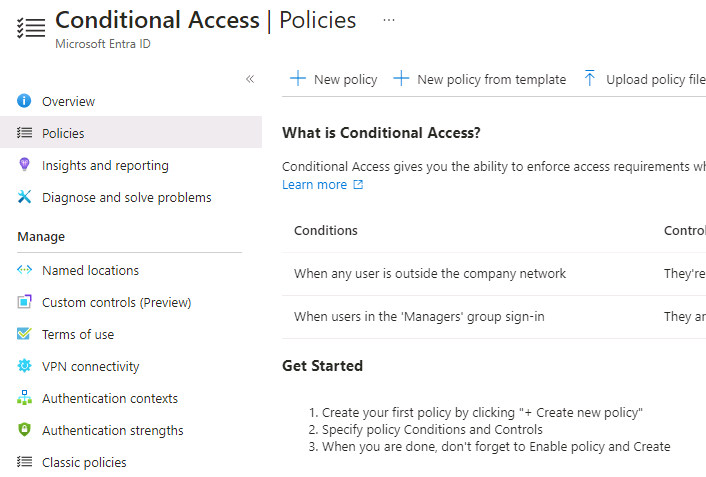
Step 1: Navigate to Conditional Access
- Return to the Microsoft Entra Admin Center.
- From the left navigation pane, select Identity.
- Under Protection, select Conditional Access.
Step 2: Create a New Conditional Access Policy
- On the Conditional Access page, click + New Policy.
- From the drop-down menu, select Create New Policy.
- The policy creation wizard opens, allowing you to define users, target applications, conditions, and access controls to enforce MFA requirements.
Note: Conditional Access policies provide a flexible and secure way to protect organizational resources by requiring additional verification when specific access conditions are met.
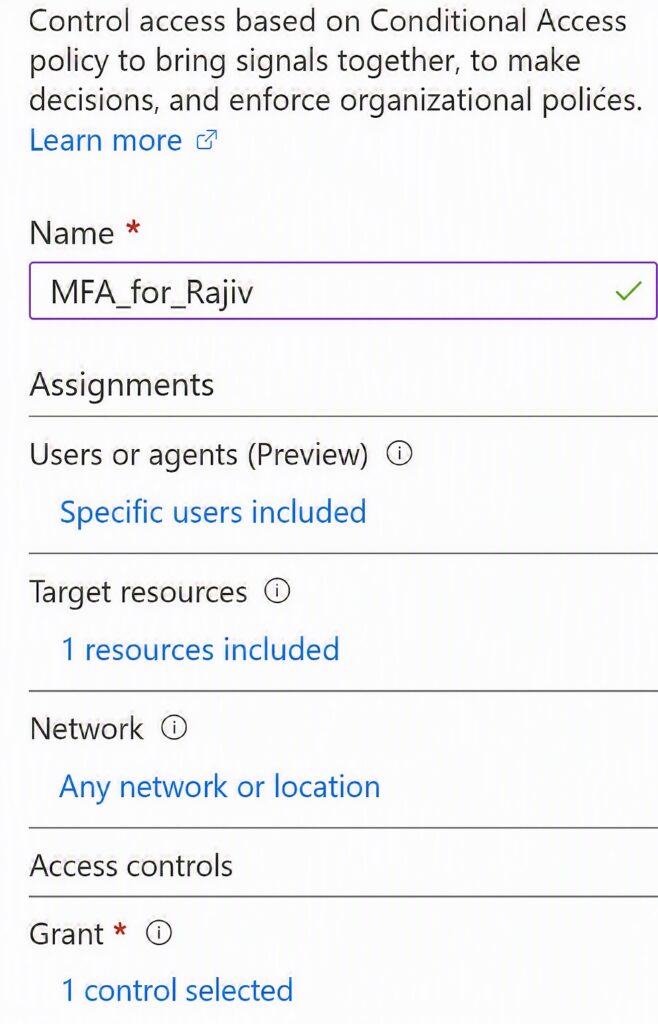
Step 3:
1) Navigate to Conditional Access and create a new policy.
Policy Name: MFA_for_Rajiv
2) Under Assignments, select Users or workload identities.
3) Configure the target user:
Select 0 users or workload identities selected.
Enable Select users and groups.
Choose Users and groups.
Select Rajiv Pandey from the available user list.
Click Select to confirm the assignment.
4) Configure the target resource:
Under Target resources, select No target resources selected.
Ensure Cloud apps is selected from the dropdown.
Under Include, select Resources (formerly Cloud apps).
Click Select resources.
Select None, then choose Office 365 from the resource list.
Click Select to add the Office 365 application scope.
5) Configure location-based conditions:
Under Conditions, select 0 conditions selected.
Scroll to Locations and set it from Not configured to Configure = Yes.
Select Any network or location to apply the policy regardless of source location.
6) Configure access controls:
Under Grant, select 0 controls selected.
7) Enable Require multifactor authentication.
Verify that Require all selected controls is selected.
Click Select to save the grant control configuration.
Enable and deploy the policy:
Set Enable policy to On.
Review the configuration and select Create to deploy the Conditional Access policy.
Result
This Conditional Access policy enforces Multi-Factor Authentication (MFA) for the user Rajiv Pandey whenever the user accesses Office 365 resources, regardless of the network location used for sign-in.
MFA Enforcement Confirmation
Multi-Factor Authentication (MFA) has now been enabled for the selected user and application(s). The next time the guest user signs in to the assigned application, they will be prompted to register an MFA method and complete MFA verification.
Task 3 – Test Rajiv’s Login
- Open a new InPrivate/Incognito browser window.
- Navigate to https://www.office.com.
- Select Sign in.
- Enter the user account: RajivP@
- Enter the password: Tenant Global Administrator Password
(Refer to the Lab Resources tab for the administrator credentials.)
Expected Behavior
At this stage, one of the following scenarios may occur:
- Scenario 1 (Expected):
- The user is prompted to register the Microsoft Authenticator app and complete MFA enrollment.
- Follow the on-screen instructions using your mobile device to finish the registration process.
- Scenario 2:
- A sign-in failure message may appear with multiple recovery options.
- Select Try Again and continue the sign-in process.
Verification
Successful MFA registration and verification confirm that the Conditional Access policy configured for Rajiv is functioning correctly. As a result, MFA is required before accessing the Microsoft 365 home page.
Exercise 2 – Configure MFA Using Per-User MFA
Task 1 – Configure Microsoft Entra Per-User MFA
In this exercise, you will configure MFA directly at the user-account level using the Per-User MFA feature in Microsoft Entra ID.
Steps
- Return to the Microsoft Entra Admin Center.
- In the left navigation pane, expand Identity.
- Select Users > All Users.
- From the toolbar at the top of the Users page, select Per-user MFA.
Note: If the Per-user MFA option is not immediately visible, select the ellipsis (…) menu to access additional actions and locate the Per-user MFA option.
This will open the legacy MFA management portal, where you can enable, disable, or enforce MFA for individual user accounts.

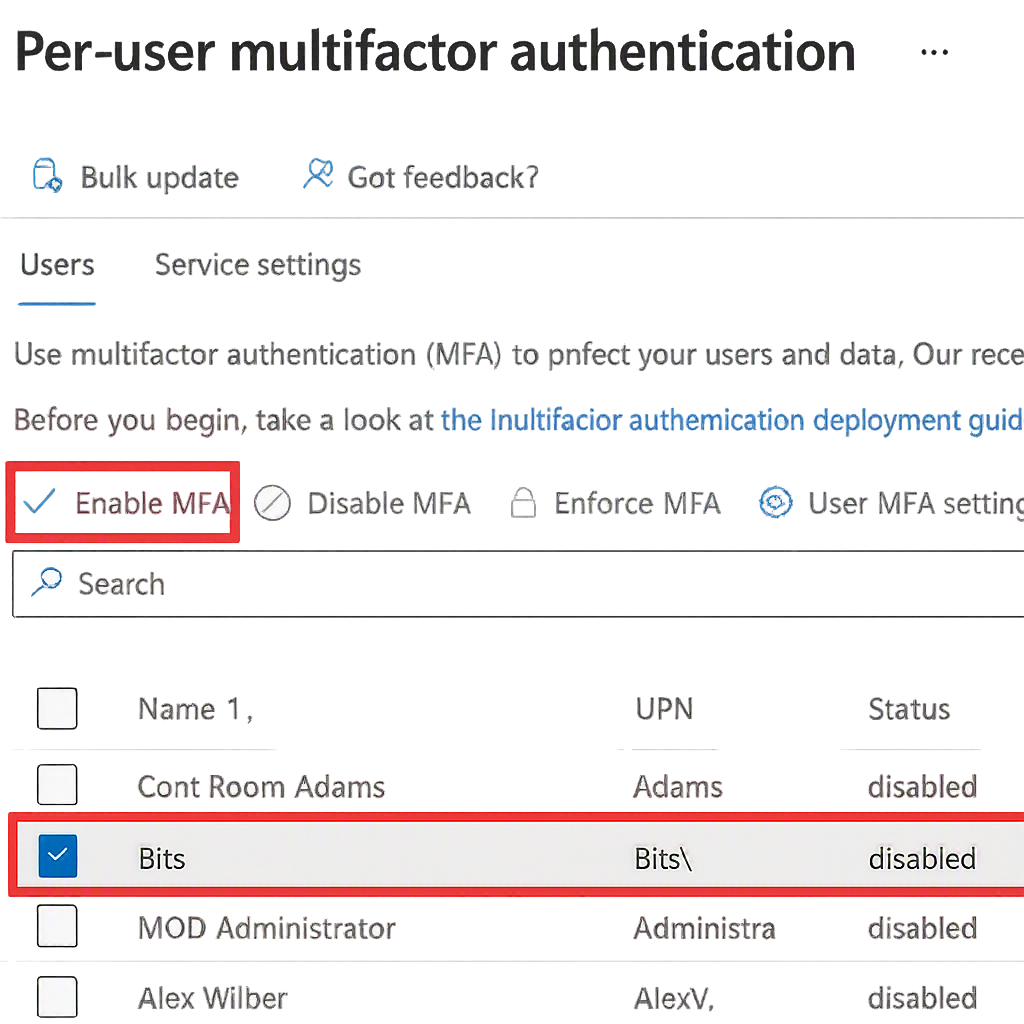
A new browser tab or window will open displaying the Multi-Factor Authentication (MFA) User Management page.
From this page, you can manage MFA settings for individual users:
- Select the required user account.
- Use the Quick Steps pane on the right-hand side to Enable, Disable, or Enforce MFA.
- Verify the user’s MFA status after making the necessary changes.
Copilot said:
Enable Multi-Factor Authentication (MFA) for a User
- Select Bits and mark the checkbox next to the user’s name.
- Under Quick Steps, select Enable MFA.
- If a notification prompt appears, review the information and select Enable Multi-Factor Auth to confirm.
- Select Close to exit the confirmation window.
- Verify that Bits MFA Status is now displayed as Enabled.
- To review MFA configuration options, select Service Settings and examine the available authentication settings.
- Once reviewed, close the MFA Settings tab/window.
Result: Multi-Factor Authentication is successfully enabled for Bits, and the user’s MFA status shows Enabled.
Thanks !